Tuning - Part 3 - 11/07/2015
After obtaining a new rotor it's time to finish this job!
I took this moment to install a new center plate as the 381 center plate doesn't provide enough advance. I put a 346 plate numbers down to start with combined with my 045 weights.
New rotor is installed! $9 and on the shelf at the local parts store.
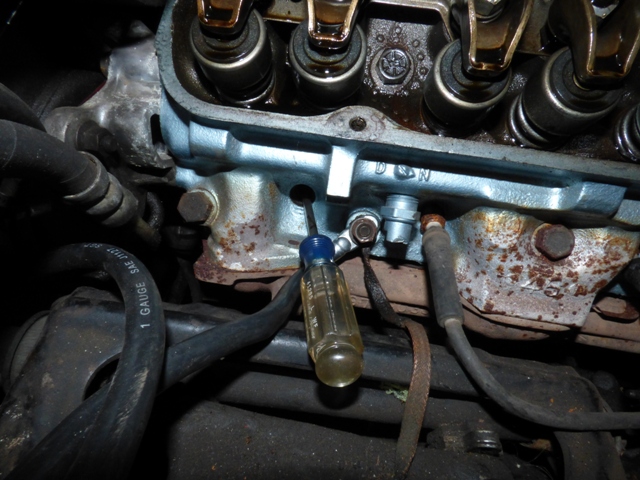
Never one to be trusting, I decided to find top dead center on my own. Pull valve cover and watch intake valve open and then close, then determine when piston was fully up (using my handy calibrated screwdriver).
It's almost exactly at 0, so that's good. Means the balancer hasn't slipped much. When I rotate the engine by hand the rotor starts to turn almost instantly, meaning the timing chain has very little slop in it, so another bonus.
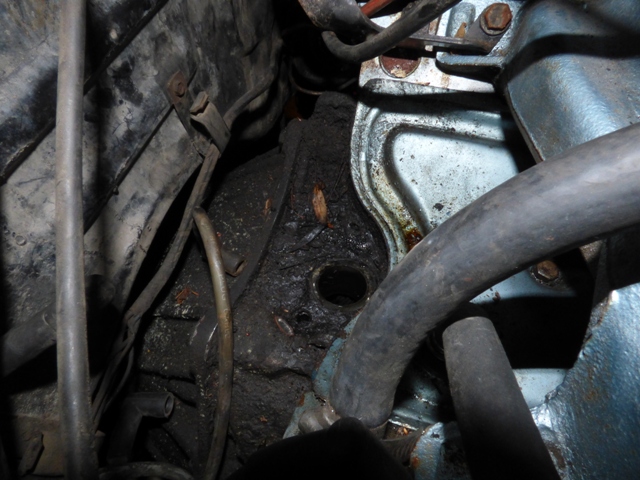
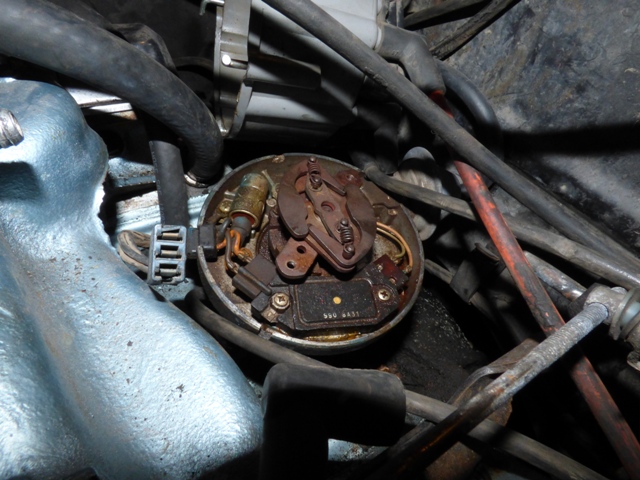
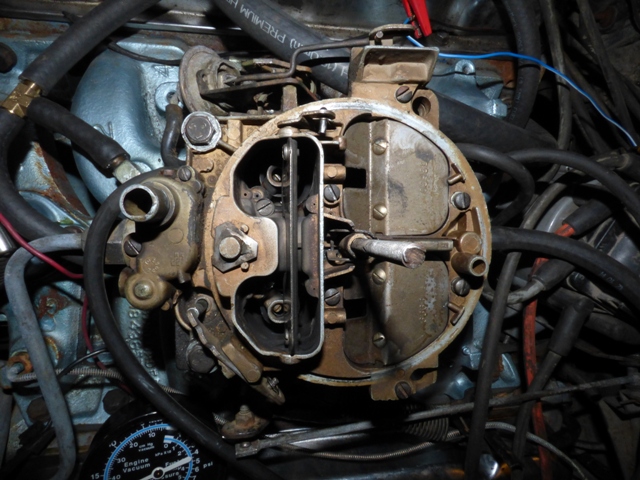
Rather than deal with the goofy position the distributor was in, I decided to pull it and re-stab it. Upon pulling I realized I should probably clean everything up too...
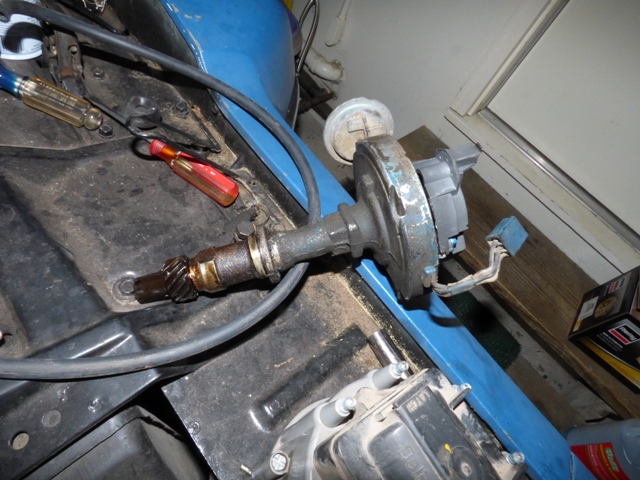
Distributor has GM corporate blue engine paint all over it (including the distributor internals and the wires) covered with nasty grease and grime. No gasket either.
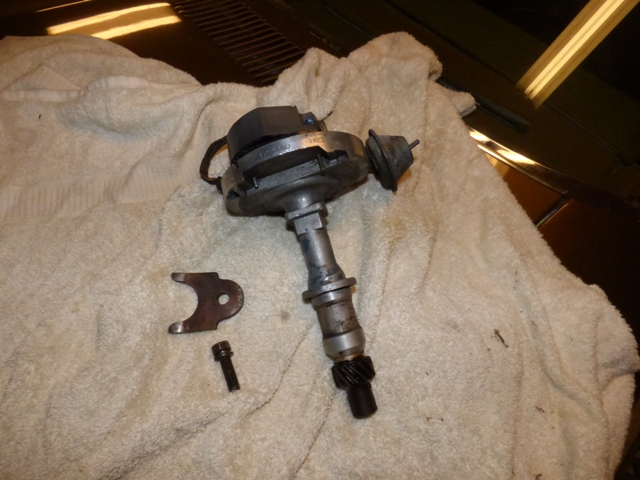
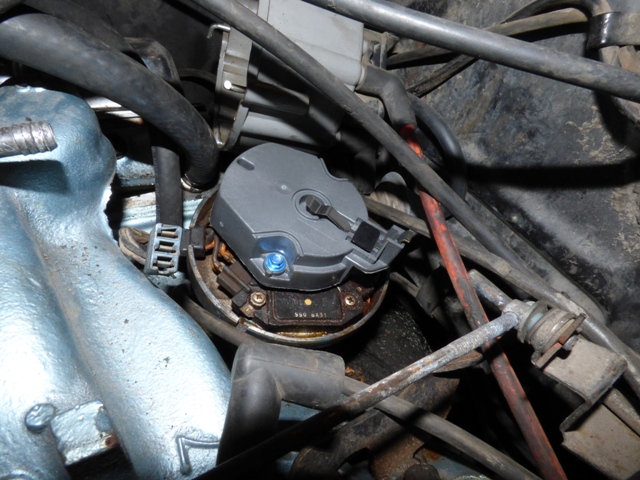
A little elbow grease cleaned that all up. Cleaned up the hold down bracket and the bolt too.

Part number is 1103310, which translates to a 1977-1979 Pontiac 301 distributor. Not really surprising, makes sense with the weights being what they were for the advance curve.
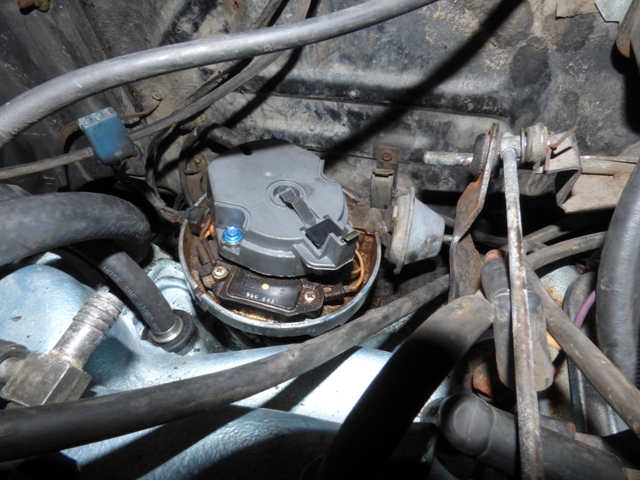
Distributor goes back in after a good scraping and application of brake cleaner to wipe down the surface. Now that we've found top dead center and wired everything up, time to fire it up and determine where it runs. It cranked fine, needed to be advanced a little on the timing as I retarded it too much, but fired up on third try without much effort. Ran smoothly and considerably better than before. When it warmed up to 195 (which didn't take too long this time) I set the initial timing at idle to 12° and it smoothed out even more.
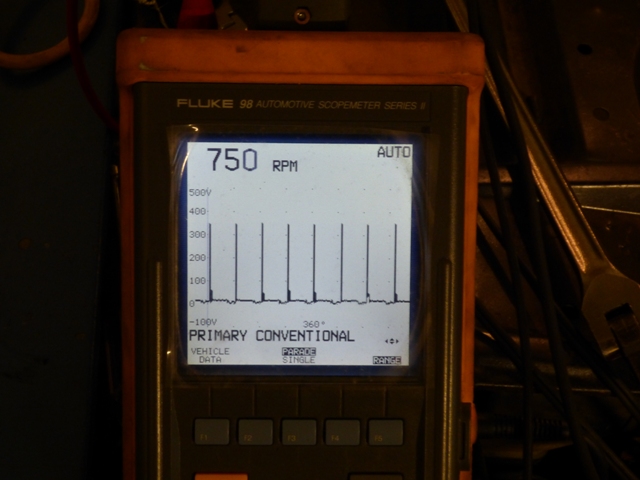
Initial starting and warm-up RPM was around 750. Not too bad.
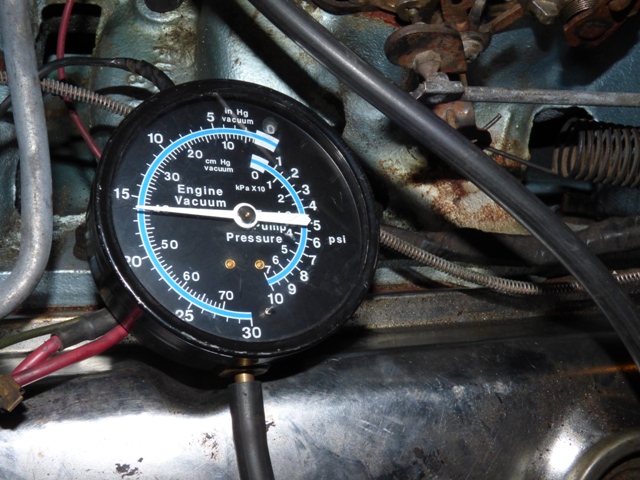
16inHg at idle. Not bad either, but I know we can do better!
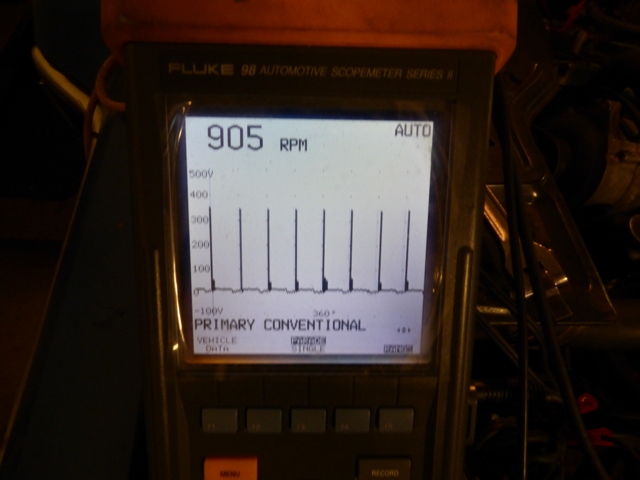
After checking for no leaks, etc, I checked the advance curve. With the springs and weights combo it was only 10° at 2500RPM. Not any better than before. Inquiring with Rocky Rotella's data sheet, I found that flipping the center plate around will give 24°. With the heavy springs, it worked and yielded 22° or so by 2500RPM. Close enough, we aren't using the most accurate tools anyways. That gives around 12° initial and 34° total mechanical at 2500RPM. Pretty much textbook, probably could bump it up ever so slightly more to get 36-38° total, but that's a decision that requires running under load in various conditions to determine if the engine will need or like it. After adjusting the idle mixture screws to 2.5 turns out driver's side and 2.25 turns out passenger side, the engine idled at 900RPM.
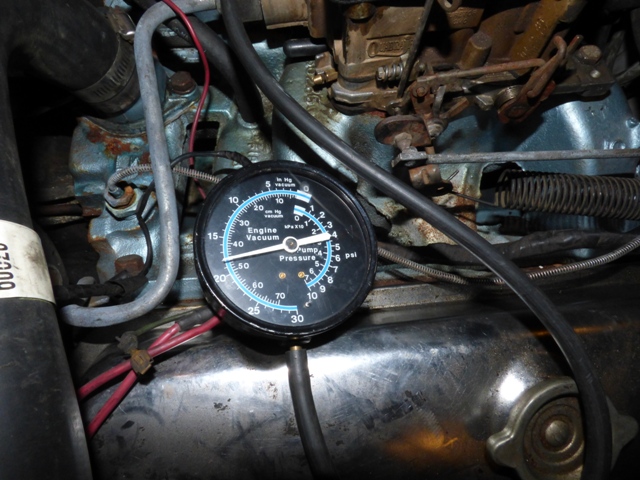
Vacuum rises to 18inHg at 900RPM. For a stick car that's pretty much where it should be. The cam isn't very big for this engine, so I'd expect vacuum to be high. After this it was time to hook up the vacuum advance. The carb doesn't have a Ported Vacuum port so I have to settle for manifold. When I hooked it up the can provided 24° advance at the crank! Just a bit much... I'll need to come up with a way to limit it to around 10-16° as the engine shoots up to 1050RPM. Leaning out the idle mixture half a turn dropped it to 975RPM, but the engine is a little lean (the idle screw has no influence at all on this carb at this position). If I cut the advance in half it will probably allow me to richen the mixture back up and keep the idle around 950RPM, which when the AC gets fixed will be perfect. Vacuum rose to a very steady 19.5inHg at this point too.
Best part of all this tuning is the end result is no more nozzle drip. Engine is running entirely on the idle circuit at idle.
Shouldn't be a surprise though, the cam is really really really tiny. Since the engine doesn't have the original heads and now sports #46 from a 1974 GTO, the compression is probably sitting right around 8.2:1, maybe 8.6:1 if the heads CC out on the lower end. I'm not really interested in pulling it apart to find out. The cam may get upgraded one day in the future, but considering the bottom end has 208k miles on it, that's not a priority at this point. Getting it running and driving stellarly has been. Now that this is done, road testing can commence. But first the shifter has to be fixed (it started to bind on the 1-2 shift and not wanting to return to neutral easily), get the reverse lights functioning (all hardware missing), fix the brake lights\turn signals, and verify that the head lights work in all circumstances. Things like re-doing the dash electrical and cluster are important, as is finding out why the ventilation doesn't actually open or close anything in the dash except the heater valve (yay for minor victories figuring that one out).
Return to 1967 Executive Wagon
Last updated November 7th, 2015