Floor Patchin' - 02/23/2013
The floor has many holes in it. Not big ones, but compromise the integrity of the floor little holes. It is just one foot slip off of the brake pedal from being a Fred Flintstone special. Like the car took water on regularly and it had no place to go. Since it had a rubber floor mat combined with no driver's side weatherstripping on the back door, water probably had a field day pooling and rusting away the floor over the years. The guy I bought it from insisted it wasn't like that when he bought it and parked it, just goes to show that an ill-conceived storage situation can really ruin a car. Luckily this is the only place that has problems. I have a spare floor section to put in, but I can't weld. So what do I do? I go to POR-15's website and order their starter kit. It has a degreaser, metal prep, gloves, brushes, and enough POR-15 to do 6 sq ft for 2 coats. All for $22 shipped. Very nice!
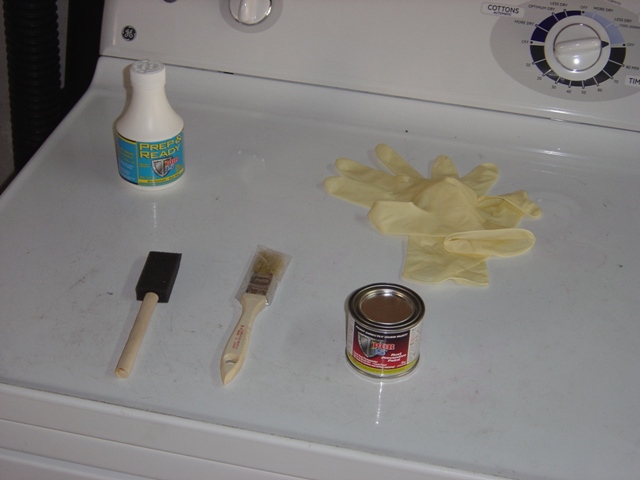
I have a spare floor section to put in, but I can't weld. So what do I do? I go to POR-15's website and order their starter kit. It has a degreaser, metal prep, gloves, brushes, and enough POR-15 to do 6 sq ft for 2 coats. All for $22 shipped. Very nice! The silver version has metal flakes in it, the instructions specifically say it is good at filling pits and strengthening the old rusted metal, and fiberglass batting will even further strengthen it.
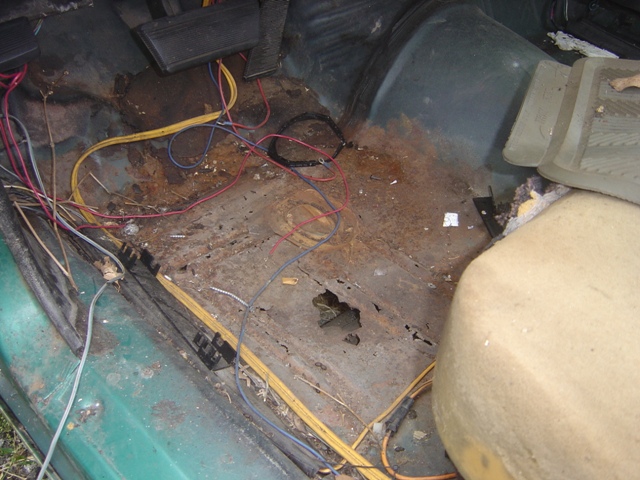
Long time readers will recognize this picture of how the car was when I got it. Pretty grim.
I found some fiberglass from Bondo at Autozone for all of $7.50. More than enough to do this small area. I pre-cut many sections to cover the holes as best as possible. Test fit for the big day.
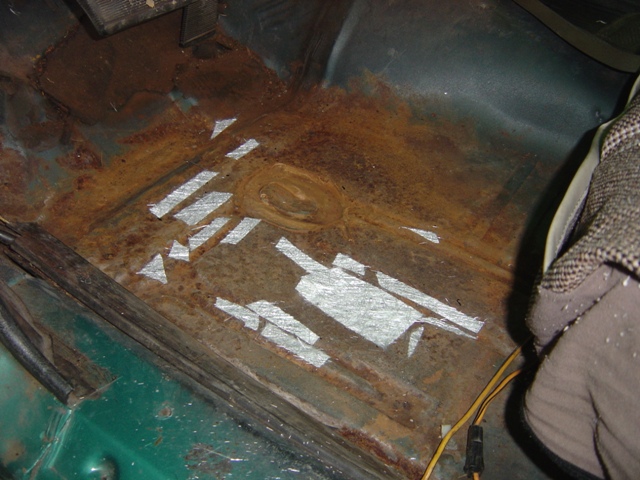
I was going to be lazy and just paint it on, but decided to follow the instructions to the letter. I bent all the broken sections back up as close to even with each other as possible. Made it look much less like a horrible job, only some cracks and a bunch of very small holes (less than my pinky finger). The metal was wire-brushed to get any and all scale and junk off, then vacuumed and blown out with air. Then metal prep was brushed all over it. I believe this is a mild acid that will etch the metal and rust to allow the paint chemistry to bite into it hard and seal it.

All dried off after hosing down with water. It MUST be absolutely dry or the POR-15 won't adhere. No rubbing, compressed air all the way along with a strategic place in the sun. Since it only was 60, I needed all the help I could get to make it warm.
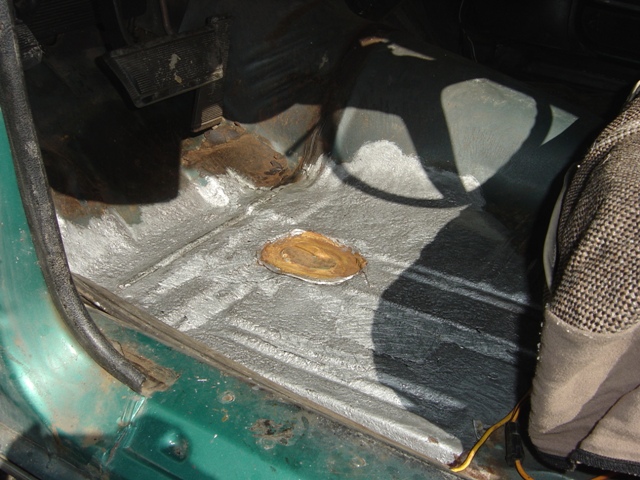
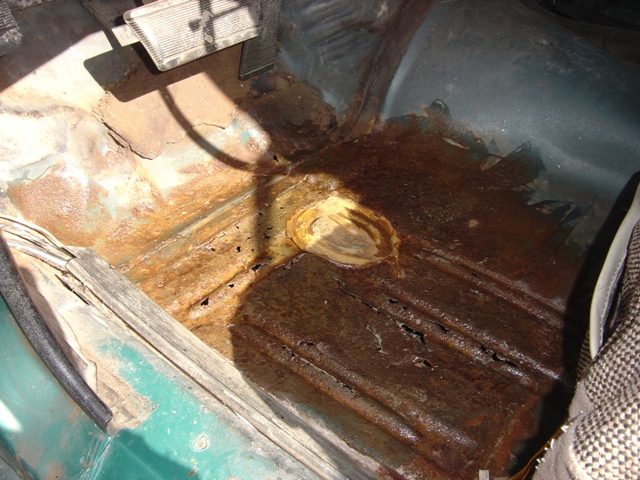
First coat is applied, waiting to tack up before the second coat goes on. The paint was applied to the entire surface, then the fiberglass batting was laid down and painted as well over it. It held up pretty well actually and looks not bad. Far from perfect honestly, carpet will cover it at least.
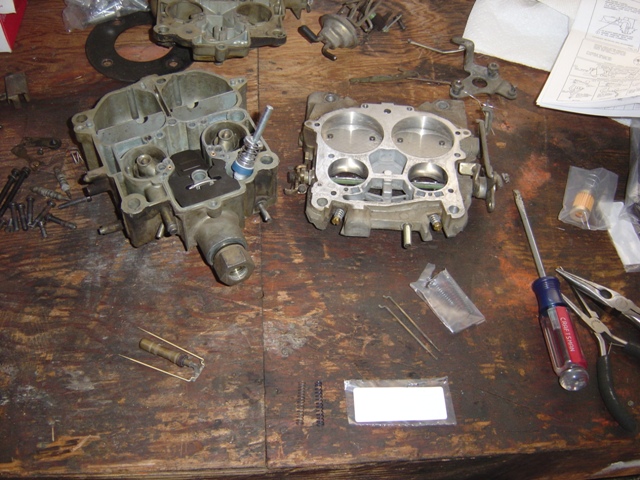
Since I had to wait for the metal prep to soak, then clean and dry, I finished putting the '69 carburetor back together! Got the kit from Cliff after spending a little while on the phone discussing the engine combination. He says it was a good base carb to work with. Only had to step up the jets from 72 to 73 and the primary rods up from 41 to 42. Cliff said the BE secondary rods are an unusual shape and very poorly matched for this application. He recommended DA rods, which were installed too.
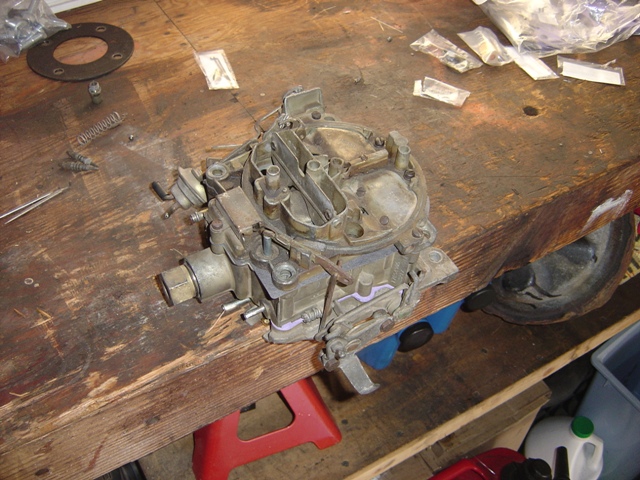
Carb all back together! Sadly I had a minor "incident" though. The primary piston rod popped up when the air horn went on and ended up tweaking the arms and a rod. I was furious. But fortunately I was able to salvage it all with some VERY careful tweaking and re-applying a more firm stake to the piston washer. Carb was put back together and all is well (you can actually move the piston from the vent with a small screwdriver, hence me checking it all).
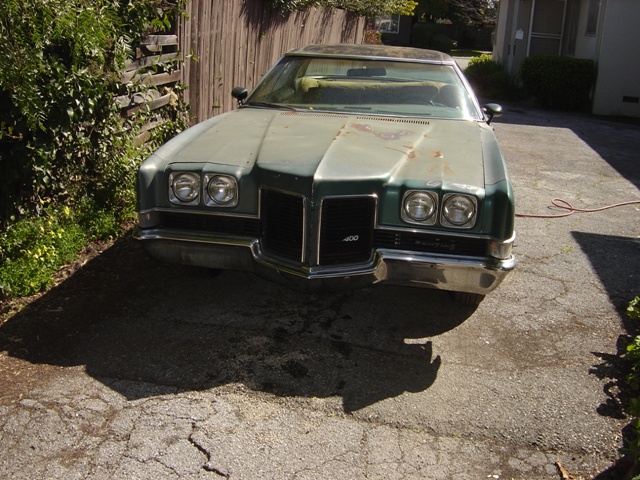
Since we're trying to make things look nice, I also put the headlight bezels back on. Nice and nifty now!
A productive day. The floor after drying and curing for 8 hours is hard as a rock and solid as can be. The underside will be coated with rubberized undercoating to cover up any spots of missing metal and prevent moisture from getting in. It's a nice solution that doesn't require a welder and sawzall. I'd have preferred NO rust, but beggars can't be choosers and 4 door big cars from '71-72 don't come around very often. Next is carpet to cover it all up and make it pretty(ier)!
Return to 1971 Catalina
Last updated February 23rd, 2012