Ventilation Repair - Part 1 - 02/01/2015
Driving a car in the winter where it is humid or rainy without a defroster is kind of asking for trouble. Driving a car in the winter that has sporadic heat is an even dumber idea. I need to fix these things to make the car reliable in the weather.
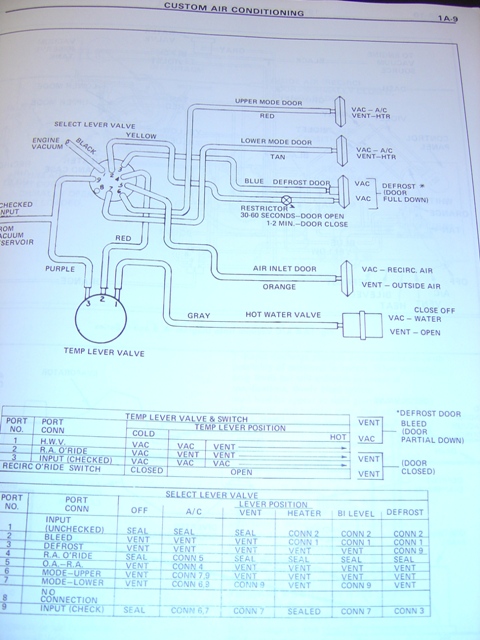
The vacuum hose schematics indicate that defrost is accomplished via the yellow and blue vacuum hoses. So I know what I'm looking for.
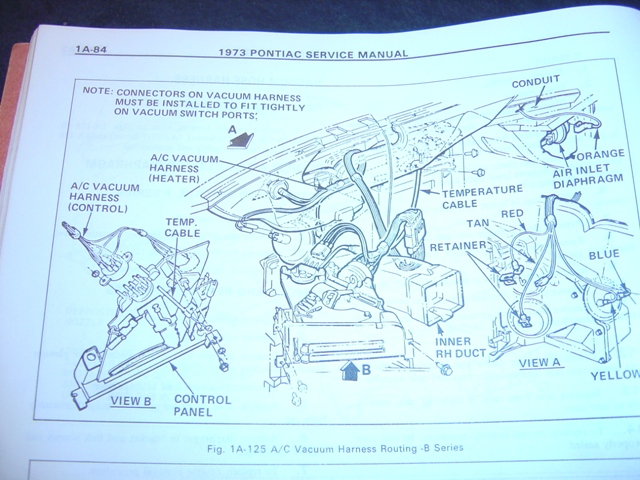
The vacuum harness shows how everything goes together inside the dash. It's not going to be loads of fun.
...after troubleshooting everything, the heater valve problem appears to be in the control head and the defrost problem is likely in the heater box or control head. Either way everything in the dash has to come out to investigate. Removing the glove box, wood grain paneling, dropping the steering column, removing the radio, etc all to get to the heater box and control head.
B-bodies have a ton of screws holding all the ventilation ducts together. These 2 screws are for the left passenger side vent.
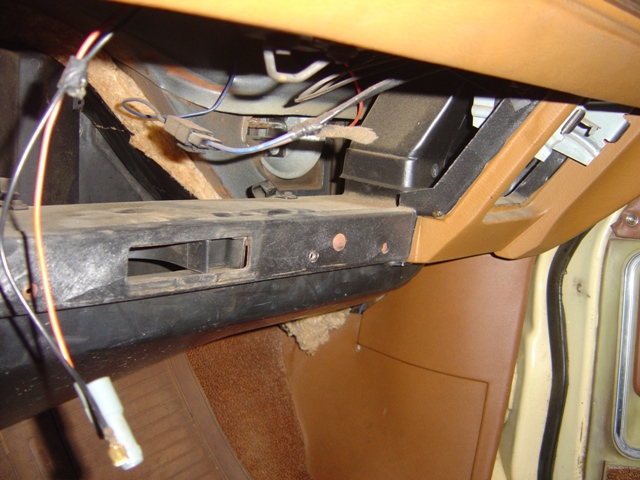
The right passenger side vent is held on here and accessed through the passenger ash tray.
The 2 driver's side vents are screwed in here on the left and upper right in places that you wouldn't necessarily see or suspect. Factory service manual drawings are critical, as is patience. Room is not in abundance on this project either. I ended up having to remove all the screws for the dash that hold it to the firewall as well. If I removed the speedometer cable, hood release cable, and electrical harness the entire thing would pop right out. Maybe I'm crazy for not going ahead and doing that...
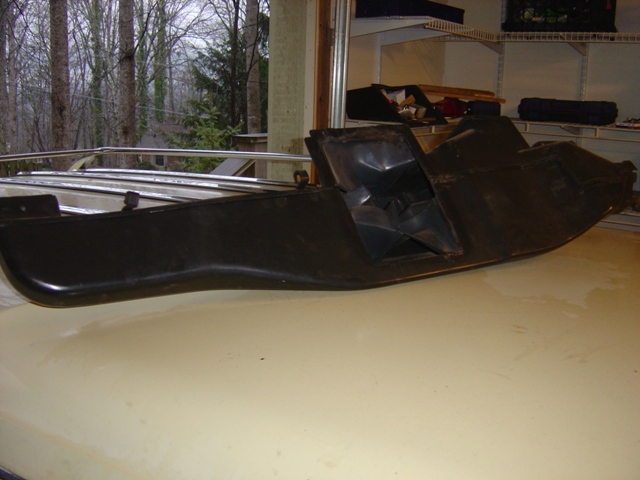
Main plenum is removed. I can take this time to clean out all the nasty dirt, dead bugs, and old decayed insulation from inside the the ducts.
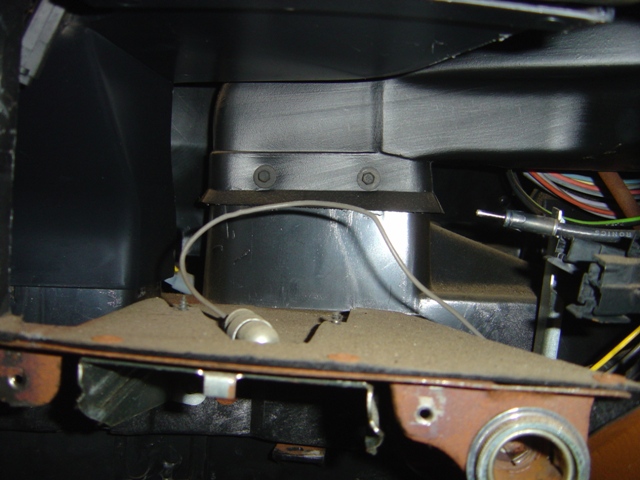
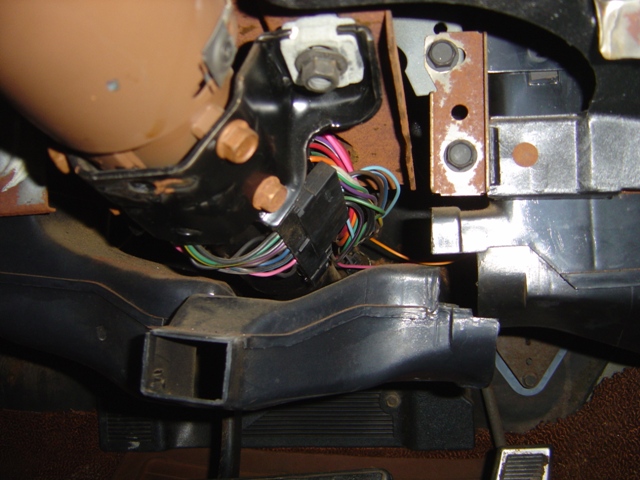
Here's the offender. The blue and yellow are for the defrost, which fortunately is on this side of the AC box. The other 2 are behind it against the firewall and require removing the entire box. The heater core doesn't leak and I REALLY don't want to have to pull this box... Applying vacuum to this dashpot doesn't do anything. You can see in the photo hairline cracks all along the body, keeping vacuum from being held.

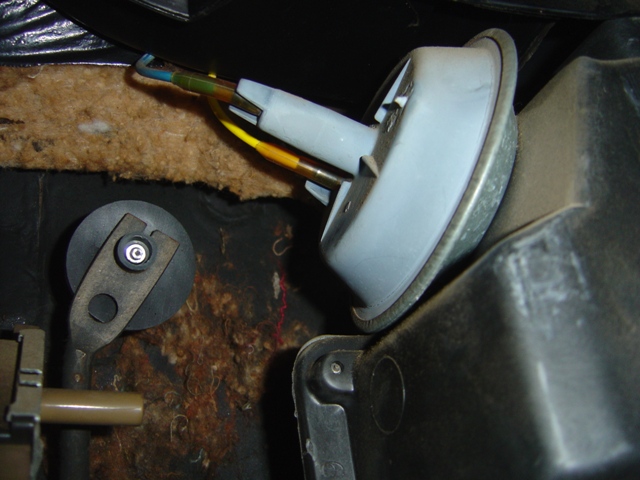
Removed and testing. No go. Time to epoxy.
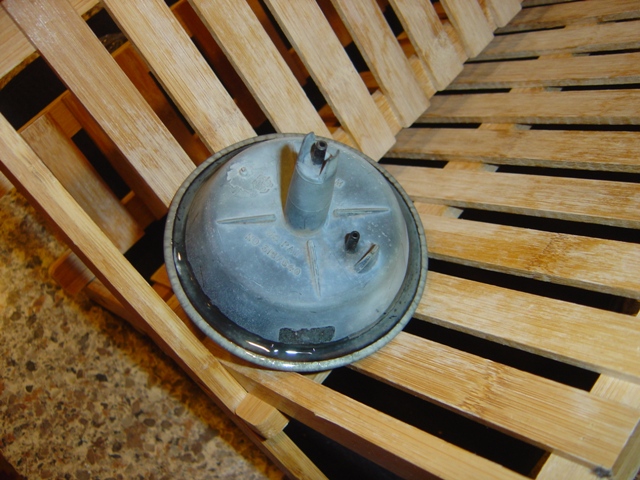
All sealed up. Since it is 45 degrees outside and rainy, the glue is taking a LOT longer than 30-60 minutes to seal up. I'm letting it sit inside overnight to let it cure.
The dashpot is holding vacuum now, but I'm still not tempting fate until it has cured for 24hrs. I found that the slider lever for the heat controls wasn't actually in its slot on the heater slider, it was outside of it. Not sure how that happened but it was an easy fix.
Return to 1973 Grand Safari
Last updated February 2nd, 2015